All posts by Lauren Bolanos

DIY Lavender Face Oil

DIY Lavender Face Oil

This DIY face oil only requires two ingredients, and is really easy to make. Those ingredients include Rose Hip Seed Oil by Pura d’or, which is an unrefined, cold-pressed, organic oil that can be used by itself as a moisturizer, or as a carrier oil for essential oils. In this recipe, I used organic lavender essential oil.

I’ve tried many oils on my face,  but I have acne prone skin and I’ve never been a big fan until rose hip seed oil. This oil is considered a “dry” oil, which means it is easily absorbed into the skin and doesn’t leave a greasy residue like a lot of other natural oils. I was able to apply liquid foundation and powder after it was absorbed with no problems.

This oil is used by celebrities such as former Victoria Secret model Miranda Kerr, and actress Rose Byrne. Plus, it’s been around for a long time. It was used by the Egyptians, Mayans, and Native Americans for it healing properties. Rose Hip Oil is great for soothing inflamed, sensitive skin (which I have) and can be used to treat acne (which I also get), sunburns, and eczema. It’s a skin brightener too, and helps with sun damage and acne scaring. It’s also great for wrinkles since it contains essential fatty acids, as well as tretinoin (also called all-trans retinoic acid), a vitamin A acid that retinol converts to, which also helps treat acne.

Lavender essential oil is another great ingredient for soothing inflamed, acne-prone skin. It’s antibacterial as well, and is used in aromatherapy to calm the mind and reduce stress. Apply at night, to help you fall asleep.


Lavender Face Oil

Prep time: 2 minutes
Total time: 2 minutes

Ingredients

  • 2 tbsp of organic rose hip seed oil (Pura d’or)
  • 2-3 drops of organic lavender essential oil (Aura Cacia)
  • 1 amber eye dropper bottle

Directions

  1. Combine rose hip seed oil and lavender essential oil in amber eye dropper bottle.
  2. Shake to mix oils, and add 3 drops to hands, rub hands, and gently pat into your face.
  3. (Optional) Wait a few minutes for oil to absorb before applying makeup.

Sources:

Rosehip Seed Oil: Why This Miracle Skincare Product Will Be The Next Coconut Oil by Huffington  Post
Can Rosehip Oil Give You Supermodel Skin? by FoxNews

Rosehip Seed Oil by Wikapedia

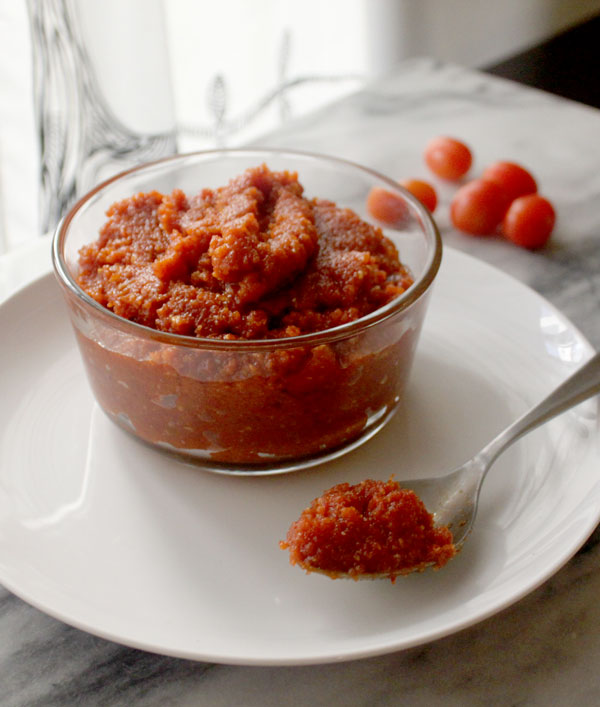
Sun-Dried Tomato Pesto

Sun-Dried Tomato Pesto - Healing and Eating

This sun-dried tomato pesto is raw and vegan friendly. The sun-dried tomatoes were a bit of a impulse purchase when I went shopping at Surfas, which is an amazing gourmet food and kitchen supply store, geared towards culinary professionals in Culver City. They were not packed in oil, so I was able to use my favorite extra virgin olive oil to soak the sun-dried tomatoes in, which added another delicious layer of flavor. All olive oils have their own flavor profile, similar to wines, so definitely keep that in mind and use the good stuff.

I used pine nuts as a substitute for Parmesan cheese. Do not sub out the pine nuts. They are needed for the cheesy flavor that you miss, when you’re dairy free. The more pine nuts you use, the creamier your pesto will turn out. Plus, their flavor is buttery and pretty neutral, so it won’t overpower the rest of the ingredients. If you’re not a fan, you soon will be.


 Sun-Dried Tomato Pesto

Prep time: 10 minutes
Cook Time: 5 minutes
Total time: 15 minutes
Serving Size: 4-6

Ingredients

  • 1 cup of packed sun dried tomatoes that were soaked in extra virgin olive oil
  • 1.5 cups of pine nuts
  • 2 cloves of pressed garlic
  • sea salt and black pepper to taste (3 grinds each)
  • 1/2 cup extra virgin olive oil

Cooking Directions

  1. Add sun dried tomatoes, pine nuts, pressed garlic, and extra virgin olive oil, until desired smoothness.
  2. Add sea salt and black pepper to taste, about three grinds each.

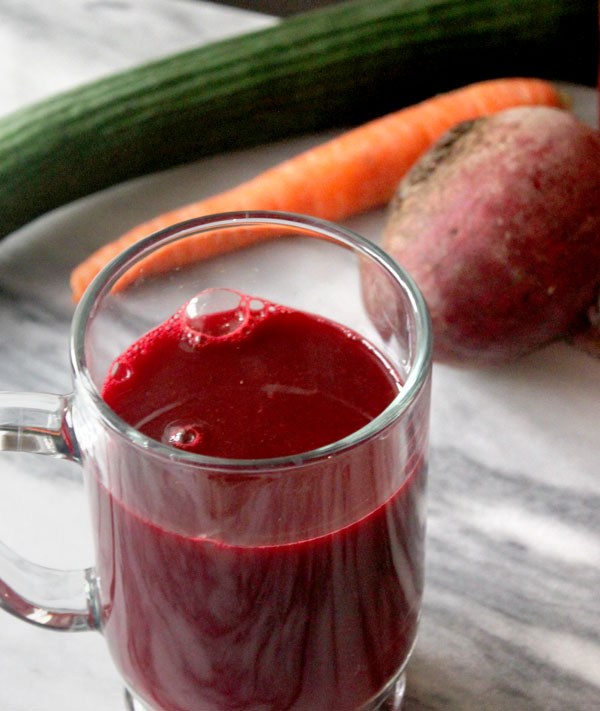
Beet and Carrot Juice

beet-carrot-cucumber-juice

This juice made from beets, carrots, and cucumbers is my all time favorite to make. I wanted to make some juice recipes for my blog, since one of my resolutions is to use my juicer more. It’s a great tool to easily consume and absorb a ton of nutrients at once, but there are down sides too. Like too much sugar, no protein, and it can be a hassle to set up, dissemble and clean, especially compared to how easy the Vitamix is to use. I’ve also had issues with certain foods getting stuck (celery I bitching about you).

This recipe is one of my favorites because the hard carrots and beets juice up easily. I use a cucumber as well, as a base to get in more liquid. Carrots, beets, and cucumbers have natural sugars that I find sweet enough, so I don’t need fruit. Plus, the end result is still sweet enough that it tastes delicious.  This recipe just fills up one juicing pitcher at four cups, making this my all time favorite juice.

The benefits of the veggies in this juice are surprisingly similar. Beets are amazing for a lot of things including blood pressure, stamina, detoxification, inflammation, and they also help prevent cancer. Carrots have similar benefits for the heart, detoxification, inflammation and cancer prevention. Cucumbers are also great for detoxification, brain health, inflammation, and heart health. I’m actually pretty obsessed with cucumbers and use them as a base for liver pates, chicken and tuna salads, and as a snack with a little sea salt when I’m craving crunchy and salty food, which is all the time. Basically they’re my healthy substitution for chips and crackers. On that tangent, I hope everyone had a great holiday and New Years, and I hope you are as excited as I am to get back to the healthier stuff!


Beet and Carrot Juice

Prep time: 10 minutes
Total time: 10 minutes
Yield: 4 cups

Ingredients

  • 3 large beets
  • 2 lbs bag of carrots
  • 1 seedless cucumber

Cooking Directions

  1. Cut vegetables into pieces small enough for the juicer
  2. Juice vegetables alternating between beets, cucumber, and carrots.
  3. Strain through a nut milk bag.
  4. (optional) Refrigerate or a half hour. Then drink up.

Popular Recipes of 2014

Thank you for making 2014 such a great year! This year has been really busy for my blog, which is actually pretty new. I started it Blogger in 2013 as a way for me to keep track of my recipes, and have been trying to improve it ever since. This year, I moved it from Blogger to WordPress, and from taking pictures with a camera phone to a DSLR. I’ve redesigned my site myself, and learned a lot in the process … including how to cook 🙂

I wanted to share with you my popular recipes of 2014. The Pesto Zucchini Pasta was a favorite on Pinterest as well, so I’d like to do more veggie noodle pastas for 2015 …

1. Pesto  Zucchini Pasta

raw-pesto-zucchini-pasta

2. Slow Cooker Oxtail Soup

oxtailsoup

3. Steamed Apples with Cinnamon

Steamed Apples - Healing and Eating

4. Broccoli and Breakfast Sausage Quiche

Broccoli and Breakfast Sausage Quiche - Healing and Eating

5. Chicken and Avocado Salad

chicken_avocado_salad_v03

Baked Pepperoni Chips

baked-pepperoni-chips

Merry Christmas! These baked pepperoni chips were a hit at Christmas Eve. Plus, they are really easy to make. These chips make a fun snack food for those avoiding carbs, grains, and gluten. But they are pretty salty and spicy on their own, so be sure to serve it with some festive drinks, and don’t add any additional seasoning! Trust me, they don’t need it.

I hope everyone had a yummy holiday! I know I sure did.

Baked Pepperoni Chips
 
Author: Lauren Bolanos
Prep time: 2 minutes
Cook time: 8 minutes
Total time: 10 minutes
Serves: 4-6
Ingredients
  • 1 lb sliced pepperoni
Instructions
  1. Line cookie sheet with foil.
  2. Place sliced pepperoni on cookie sheet and bake for 8 minutes at 350 degrees.
  3. Let pepperoni drain on a paper towel, and the oil dry out a bit before serving.

Mexican Wedding Cakes

mexican-wedding-cakes

I altered a family Christmas cookie recipe to make it dairy free and gluten free. It tastes like the original, which was my goal. However, this recipe isn’t sugar free. You can easily substitute a natural sweetener, but the cookie will not taste the same. I still haven’t found a good replacement for the flavor of powdered sugar (aka confectioners sugar). Here is the original recipe to reference:

Original Recipe

Ingredients
  • 1 cup of butter
  • 3/4 cup of confectioners sugar
  • 1 tsp vanilla extract
  • 2 cups of flour
  • 1 cup of finely chopped nuts

Directions: Cream butter, confectioners sugar and vanilla. With a spoon, blend in the flour. Add nuts; shape into 3/4 inch balls, rolling in palm of hand. Place 1/2 inch apart on ungreased cookie sheets and bake in 300 degree oven 25-30 minutes or until cookies are a creamy color. Remove to rack until just warm; rol in confectioners sugar. Makes approximately 3 1/2 dozen.

Mexican Wedding Cakes
 
Author:
Serves: 4
Ingredients
  • 1 tsp vanilla extract
  • ¾ cup powdered sugar (confectioners sugar)
  • 1¼ cup arrowroot flour
  • 1 cup almond flour
  • 1 cup organic palm oil (or vegan butter)
  • 1 cup chopped hazelnuts
Instructions
  1. In a large bowl, mix palm oil (or vegan butter), powdered sugar, and vanilla extract.
  2. Then slowly add in almond flour and arrowroot flour.
  3. Gentle mix in finely chopped hazelnuts.
  4. (Optional) Refrigerate dough for a half hour.
  5. Roll into small balls about ¾ inches wide.
  6. Line baking sheet with parchment paper, and bake for 25 minutes at 300 degrees.
  7. (Optional) Roll them in powdered sugar when warm or sprinkle them with powdered sugar when cool.