Category Archives: Desserts

Chocolate Covered Strawberry Ice Cream

Chocolate Covered Strawberry Ice Cream

This chocolate covered strawberry ice cream is paleo and vegan friendly. I used Enjoy Life Chocolate Chips for the chocolate shell. As soon as the melted chocolate chips hit the cold ice cream, they hardened up.  This chocolate is vegan and allergen friendly, and tastes amazing. You can usually find it at your local Whole Foods.

This was my second time using the ice cream maker and I made way too much this time. Don’t overfill your ice cream maker – which I did. As soon as it starts getting too full, scoop out what you have and transfer to a freezable container, then add the rest of the strawberry smoothie mixture to the ice cream maker. Luckily, you only need to run the ice cream maker for 20 minutes, so it’s entirely possible to make your ice cream in batches.

Chocolate Covered Strawberry Ice Cream
 
Prep time
Cook time
Total time
 
Author:
Serves: 15
Ingredients
  • 1 cup of Enjoy Life Chocolate Chips
  • 1 can regular coconut milk
  • 1 can light coconut milk
  • 2 cartoons of strawberries (16 oz each)
  • 1 small can of coconut cream (5.4 oz)
  • 4 tbsp of honey
Instructions
  1. Blend coconut milk, strawberries, coconut cream. Strain out the strawberry seeds.
  2. Then blend in the honey. Use more or less depending on the sweetness of the strawberries.
  3. Refrigerate mixture for at least two hours.
  4. Take freezer bowl out of freezer, and assemble ice cream maker according to instructions.
  5. Pour mixture into freezer bowl and turn on ice cream maker for 20 minutes.
  6. When 20 minutes are finished scoop out ice cream and transfer to freezable container. Repeat until mixture is all turned into ice cream.
  7. Freeze mixture overnight, then when ready to eat, scoop ice cream into a bowl, and store it in the freezer so it doesn't melt, when making chocolate shell.
  8. On a double boiler, melt chocolate chips, then spoon that over ice cream and serve. Chocolate will harden when it hits the cold ice cream.
Coconut Date Ice Cream

Coconut Date Ice Cream - Healing and Eating

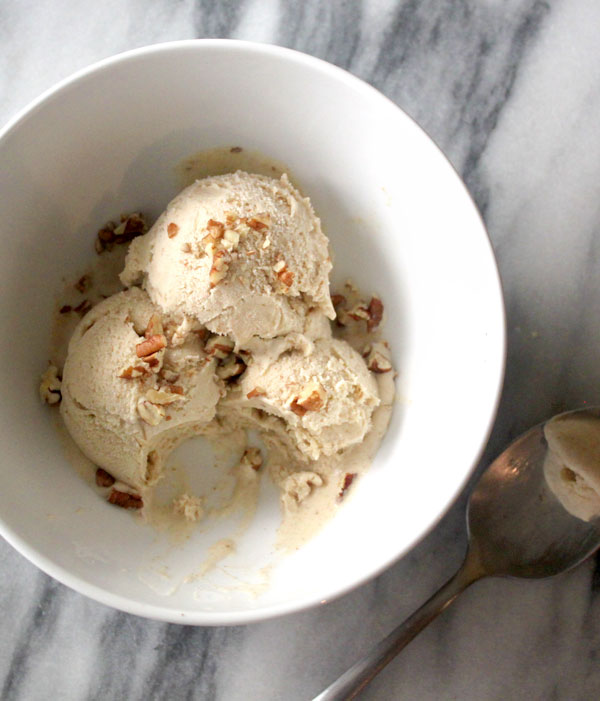
This coconut date ice cream only uses two ingredients – coconut and dates. It’s paleo and vegan friendly, and really easy to make. This was the first time making ice cream in an ice cream maker. (Instead of a Vitamix)  I recently got one by Cusinart on sale a few days before Christmas. Luckily it’s warm in LA right now, and will only get warmer, so I decided I couldn’t wait any longer to test out my new gadget. It worked like a charm. Although I suggest freezing the ice cream after you make it. It comes out of the ice cream maker like soft serve, but I prefer mine colder and more solid, so I get pretty scoops and it doesn’t melt as easily.

Coconut Date Ice Cream
 
Prep time
Cook time
Total time
 
Author:
Serves: 1 quart
Ingredients
  • 3 cups of coconut milk (full fat)
  • 18 medjool dates (12oz)
  • (optional) chopped pecans for topping
Instructions
  1. Blend coconut milk and dates in Vitamix.
  2. Chill mixture in fridge for at least two hours.
  3. Take out frozen freezer bowl. This should be stored in your freezer.
  4. Assemble ice cream maker according to directions and pour in coconut and date mix.
  5. Turn on for 20 minutes for soft serve.
  6. (optional) Transfer from freezer bowl to another freezer friendly ice cream container. Let ice cream further harden.
  7. (optional) Top ice cream with chopped pecans

Mexican Wedding Cakes

mexican-wedding-cakes

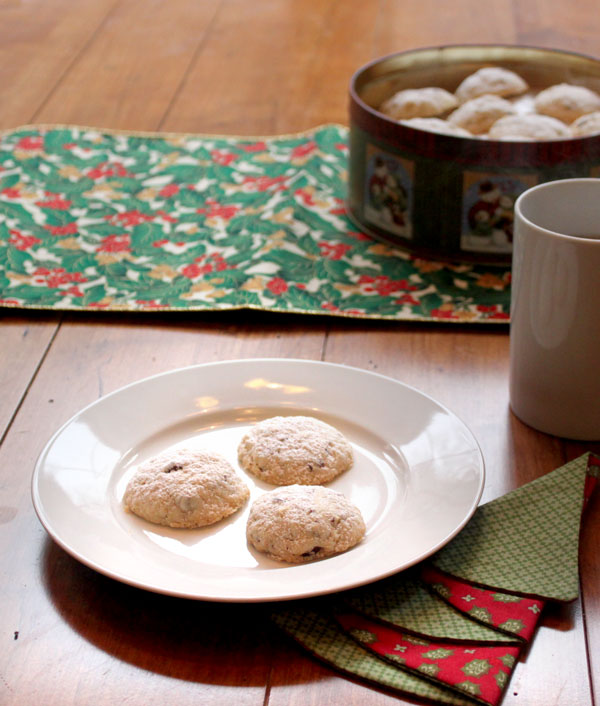
I altered a family Christmas cookie recipe to make it dairy free and gluten free. It tastes like the original, which was my goal. However, this recipe isn’t sugar free. You can easily substitute a natural sweetener, but the cookie will not taste the same. I still haven’t found a good replacement for the flavor of powdered sugar (aka confectioners sugar). Here is the original recipe to reference:

Original Recipe

Ingredients
  • 1 cup of butter
  • 3/4 cup of confectioners sugar
  • 1 tsp vanilla extract
  • 2 cups of flour
  • 1 cup of finely chopped nuts

Directions: Cream butter, confectioners sugar and vanilla. With a spoon, blend in the flour. Add nuts; shape into 3/4 inch balls, rolling in palm of hand. Place 1/2 inch apart on ungreased cookie sheets and bake in 300 degree oven 25-30 minutes or until cookies are a creamy color. Remove to rack until just warm; rol in confectioners sugar. Makes approximately 3 1/2 dozen.

Mexican Wedding Cakes
 
Author:
Serves: 4
Ingredients
  • 1 tsp vanilla extract
  • ¾ cup powdered sugar (confectioners sugar)
  • 1¼ cup arrowroot flour
  • 1 cup almond flour
  • 1 cup organic palm oil (or vegan butter)
  • 1 cup chopped hazelnuts
Instructions
  1. In a large bowl, mix palm oil (or vegan butter), powdered sugar, and vanilla extract.
  2. Then slowly add in almond flour and arrowroot flour.
  3. Gentle mix in finely chopped hazelnuts.
  4. (Optional) Refrigerate dough for a half hour.
  5. Roll into small balls about ¾ inches wide.
  6. Line baking sheet with parchment paper, and bake for 25 minutes at 300 degrees.
  7. (Optional) Roll them in powdered sugar when warm or sprinkle them with powdered sugar when cool.

Honey Walnut Cookies

honey-walnut-cookies

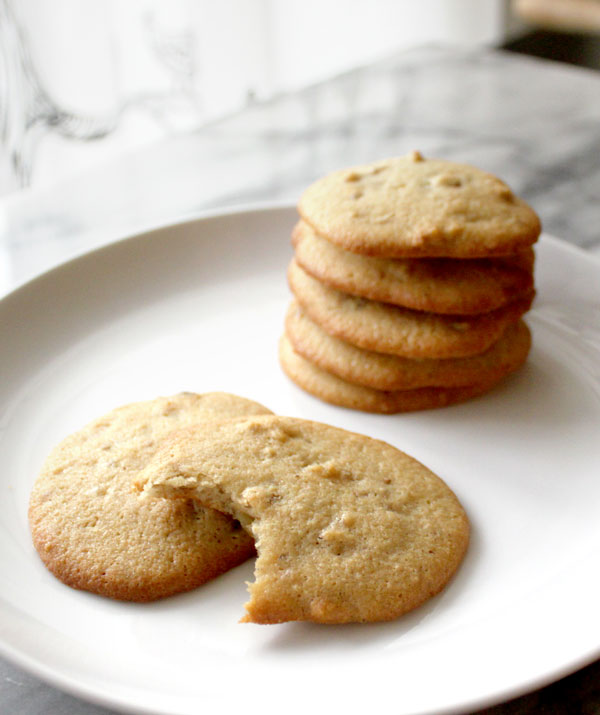
These honey walnut cookies are a delicious guilt-free indulgence. They are made with almond and arrowroot flour and they are soft, and fluffy inside. If someone doesn’t like walnuts, since they do have a strong flavor, you can easily substitute sliced almonds or pistachios. Walnuts are just what I had in my pantry, when attempted and failed at paleo pizzelles. Despite my failed first recipe, I am really happy with the texture and height of these cookies and plan on using a similar recipe base for future cookie attempts. If you like your cookies a little golden brown around the edges, which I do, bake at 350 degrees. If you don’t like a little browning cook at 320.

I think these would taste great with some coffee or hot coco. You can also make them look pretty with a light dusting of confectionery sugar, or for people with a sweet tooth that can be hard to please. You can get a portable confectionery sugar duster, and then bring this batch to work and everyone can marvel at your grain-free, dairy-free baking skills.

Honey Walnut Cookies
 
Prep time
Cook time
Total time
 
Author:
Serves: 40m
Ingredients
  • 6 eggs
  • 1 cup of honey
  • 1 cup of organic palm oil (Spectrum Organic non-hydrogenated vegetable shortening)
  • 2 tsp vanilla extract
  • ¼ sea salt
  • 3½ cups of almond flour
  • 2 cups of arrowroot flour
  • ½ tsp baking soda
  • 2 cups of walnuts
  • 1 tbsp apple cider vinegar
Instructions
  1. Mix dry ingredients, sea salt, baking soda, and flours, in a large bowl.
  2. Mix wet ingredients, eggs, honey, and apple cider vinegar, in a separate bowl.
  3. Then combine wet ingredients into dry ingredients, with a hand mixer on low. Gradually increase speed and add palm oil.
  4. Use a food processor to easily pulse 2 cups of walnuts, and stir it into cookie batter.
  5. Then line a cookie sheet with parchment paper, and scoop dough into sizes a tiny bit larger than one tbsp, onto parchment paper. Leave a lot of room between cookies because they spread out.
  6. Bake at 350 for 10-15 minutes or until edges start to get golden brown.
  7. Let cookies cool for 5 minutes before removing them from baking sheet.

Rustic Apple Tart

rustic apple tart

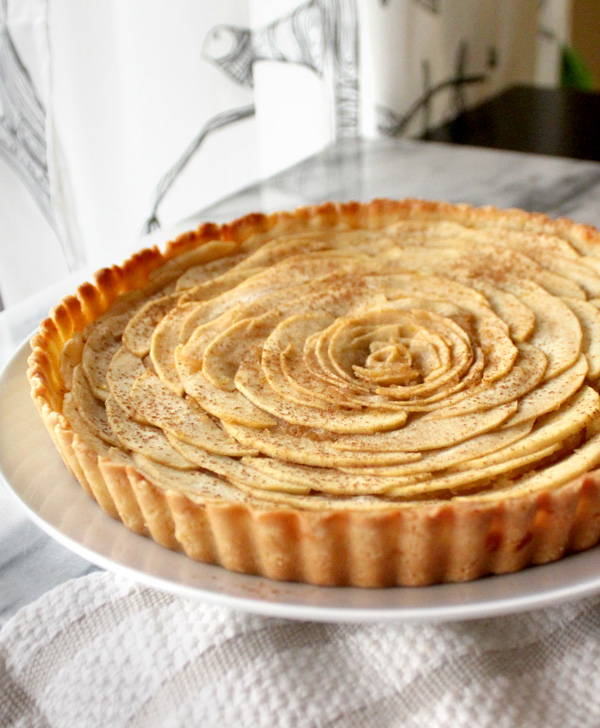
This rustic apple tart was definitely a labor of love. This was my first time using the tart pan, and it was a bit of struggle to get the tart out. Luckily, with my husband’s help and a lot of patience we were able to manage. So you might want to get an extra set of hands in the kitchen for this recipe. Arranging the apple slices was a bit tricky as well. The closer to the center, the more difficult it became. The thinner the apple slices, the easier it is to arrange them, so take your time. If it’s not perfect don’t stress, just call it “rustic” like I did. It’s not a bad thing if it looks a bit homemade. You don’t want your guests to think you bought it!

I sprinkled it with a little bit of cinnamon instead of powdered sugar. We are trying to be healthy here! The crust is a paleo pie crust made with almond flour, coconut oil, and an egg. Honestly, I prefer a savory crust when the filing is sweet. I kept the amount of natural sweeteners I used in this recipe low as well. Only one tablespoon of honey is used in the filing, and I brushed a little bit of maple syrup over the apples before I put them in the oven.

Rustic Apple Tart
 
Prep time
Cook time
Total time
 
Author:
Serves: 1 apple tart
Ingredients
  • 2 cups of almond flour
  • 2 tbsp of coconut oil
  • ¼ tsp of sea salt
  • 1 egg
  • 4 fuji apples
  • 1 tbsp of honey (optional)
  • ¼ cup of maple syrup
  • ½ tsp of cinnamon
  • ¼ cup of water
Instructions
  1. Peel and chop two fuji apples. Add apples to saucepan with water and boil until soft, about 30 minutes.
  2. Then transfer to food processor and puree to get a small batch of applesauce. Add honey if apples aren't sweet enough.
  3. Use the food processor again to make tart crust. Combine almond flour, coconut oil, egg, and sea salt until it forms dough.
  4. Then roll dough out between two pieces of plastic wrap. Otherwise the dough will stick to your roller since we use almond flour instead of regular flour.
  5. Transfer rolled out dough to pie tart. I wet my fingers with water, since there is oil in the dough, to shift dough around until tart mold is completely filled.
  6. Spread homemade apple sauce on bottom of tart.
  7. Then, peel remaining apples and arrange apple slices in an overlapping circle until you reach the center. The thinner the apple slices the easier it is.
  8. Brush maple syrup over apple slices and bake at 450 for fahrenheit for ten minutes.
  9. Then turn down the temperature to 350 for twenty minutes.
  10. Let apple tart cool before removing from tart mold.
  11. Use a sifter to garnish apple tart with cinnamon.
Nutrition Information
Serving size: 4-6

A Healthier Applesauce

healthier-applesauce

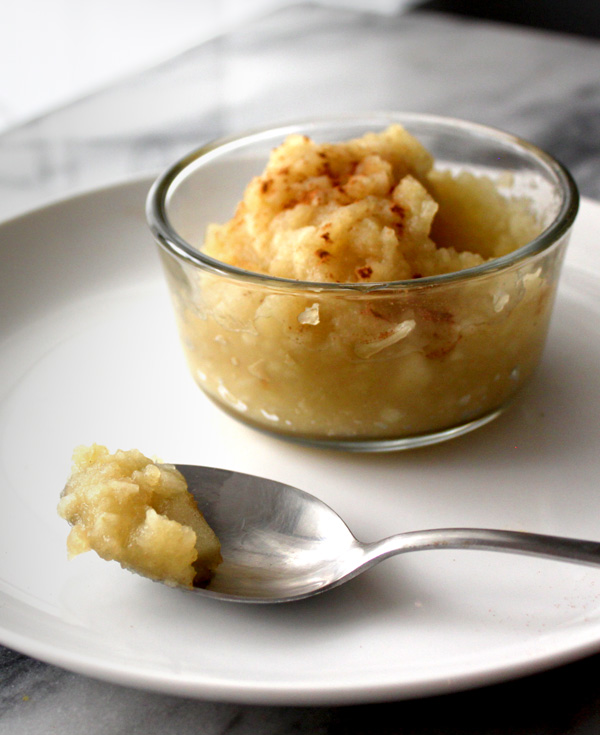
I decided to make a healthier applesauce recipe, since I can’t get enough apple recipes this fall. Now that I know how ridiculously easy it is to make it yourself, this will be one item I no longer need to buy. If you’re too old for just plain old applesauce, you can always get fancy and mix it into muffins, cakes, waffles, an well anything you can think of. I’m seriously considering adding this to popsicles. It may be October, but it’s still hot in LA.

I kept the applesauce pretty chunky and didn’t cook it down a crazy amount. I wanted to apple taste and texture to really shine through. I used Granny Smith apples, which are pretty tart, so I added some maple syrup to balance out the sour with a bit of sweetness. A lot of recipes called for brown sugar, and since maple syrup is a similar color, I thought I try it out. However, you could always use honey or eliminate the natural sweetener altogether.

A Healthier Applesauce
 
Prep time
Cook time
Total time
 
Author:
Ingredients
  • 5 granny smith apples
  • ¼ cup of grade b maple syrup
  • ½ cup of water
  • 1 cinnamon stick
  • a pinch of cinnamon
Instructions
  1. Peel and chop apples. Add them to to dutch oven with water, cinnamon stick, and maple syrup.
  2. Cook down mixture until apples are desired firmness.
  3. I prefer the apples to still be still chunky and firm. About 30 minutes. Stir often so apples don't burn.
  4. Transfer to a food processor, and blend/pulse for a few seconds. Add a pinch of cinnamon, or more to taste. A little goes a long way.
  5. (optional) sprinkle a little cinnamon over the top and serve.
Nutrition Information
Serving size: 4