All posts by Lauren Silverman

How to Live Without a Microwave


I’m not going to go into a long thing about why microwaves are bad for you. I’ve been without one for over a year and this is how I manage…easily.

1. What about microwavable dinners?

I don’t buy microwavable meals, they are full of processed chemicals, expensive, and overly salty anyway. If you like prepared food, try making a ton of leftovers over the weekend for the week. If you don’t want to cook check out the salad and sushi bar instead.

2. How do you heat your food when you are not at home?

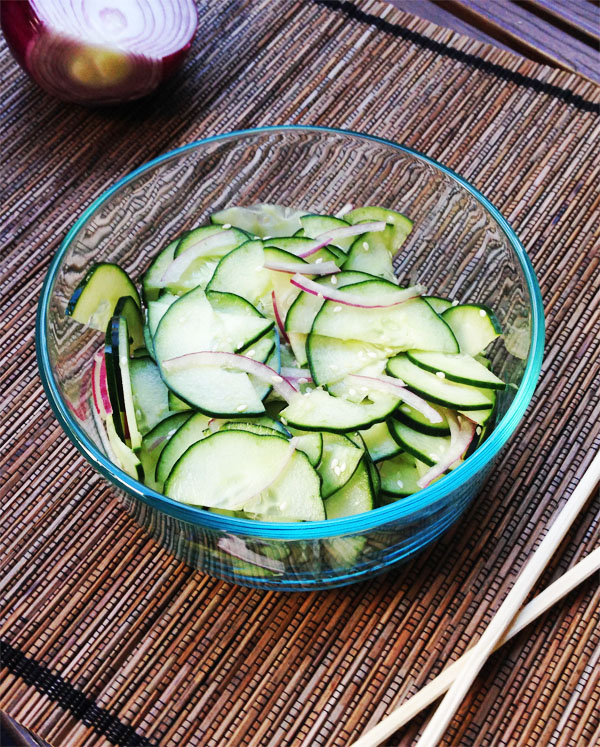
That’s easy, you bring food that doesn’t need to be heated such as salads, granola bars, veggies and dips, sushi, pasta salads, sandwiches, hard boiled eggs, pizza, and asian leftovers all taste good cold, just to name a few. Yes, all these food can be made paleo, but it will definitely take some cooking skills.

3. How do you heat your food at home?

I normally heat it over a small nonstick skillet or pan. There is usually one dish to clean, but that’s not much. I also put foil over a cookie sheet and heat up the food for 10 minutes in the oven. Then there is no cleanup when you toss away the foil. If you have the space, you can always invest in a toaster oven, but if you have an oven then a toaster oven seems redundant.

4. How do you make popcorn?

You just add a little olive oil to a skillet and throw in the kernals. Make sure the lid is on and watch it pop. We’ve tried it with coconut oil, and it doesn’t work. If you’re paleo, popcorn is technically a whole grain and you shouldn’t be eating it anyway.

6.  How do you defrost food?

Food defrosts best in the fridge, although it takes some time. You can also leave it out on the counter, or if you are in a rush, run hot water over it.

7. What about heating beverages?

This too can be done over the stove or look into getting an electric kettle. I would avoid this gadget unless you are tea obsessed and usually away from kitchen.

Tasty Food Photography Ebook Review


Lately, I’ve really wanted to step up my food photography skills. I took some photography classes back in art school and loved it, but for my food photos, I’m more interested in getting it done as quickly as possible so I can eat. I normally use my iphone camera (with no attachments) which automatically sends my pictures to Dropbox on my computer. Then, I edit them in Photoshop and format them for the web. This lets me post often and fast, which is great for frequency, but not so great for quality.

I have a few props that I use and I always take pictures in natural light. I take very few photos maybe 6 to 10, so I still have time to eat the food before it gets cold. However, pictures can easily end up blurry and the depth of field in a camera phone is nonexistent. So, in the future I’m planning on breaking out my DSLR and getting serious about my photos, which is why I downloaded Tasty Food Photography ($19) by the blog Pinch of Yum to help me get started on this project. Click here to visit Pinch of Yum for more information. 

What I liked best about the book were tips and links to set up a proper studio space for your food. Although it sounds like it would be a lot of work, they make it seem easy and affordable. Since I live in an older one bedroom apartment because Los Angeles is crazy expensive, I can’t take pictures in my unappealing and dark kitchen. So any advice I can get my hands on to make a pretty setup is greatly appreciated. I also liked how they described the different lighting situations with the camera settings that were used. Since manual settings are still something I struggle with, having the examples to reference will be really helpful as I try to get used to adjusting the camera myself.

Banana Cream Pie


I know.. another pie, but I’m kinda obsessed. For me, pies scream comfort food and rustic charm. Plus, They are ridiculously easy with my food processor. I used a paleo friendly almond flour crust. Honestly, I’m so used to eating an almond flour crust, I think pies would taste strange (and not in a good way) without it.

Banana Cream Pie
 
Prep time
Cook time
Total time
 
Serves: 1 pie 8 slices
Ingredients
  • 1 can of full fat coconut milk (look for bpa free can)
  • 4 bananas
  • ¼ tbsp of homemade vanilla extract
  • 1 tbsp of honey
  • 1 tbsp of gelatin
  • ¼ cup of water
Instructions
  1. Prebake pie crust.
  2. Blend coconut milk, bananas, vanilla, and honey in Vitamix/blender.
  3. Dissolve gelatin in water.
  4. Add mix from blender and gelatin to a pan and heat until you start to see some steam. This is to make sure gelatin is completely dissolved.
  5. Then add mixture to baked pie crust and let cool a little before adding it to fridge.
  6. Refrigerate for an hour minimum.
  7. Garnish with fresh slices of banana and serve.

Breakfast Burger Salad


I once read that you can put an egg on anything and call it breakfast, well it’s true. For the salad, I continued with the breakfast theme by adding sliced oranges, as well as red onions and sesame seeds giving the salad a Asian theme. The key to this dish is to carefully cook the burger and eggs, which I did not do. Since I’ve had tons of practice with eggs sunny side up that was a breeze, but I definitely need to practice my burger skills. On the bright side, you guys can look forward to more burger posts in the future.

Breakfast Burger Salad
 
Prep time
Cook time
Total time
 
Ingredients
  • 1 orange cut into slices
  • ⅛ cup of thinly sliced red onions
  • 1 tsp of sesame seeds
  • 2 beef burger patties
  • 2 eggs
  • ¼ cup of rice wine vinegar
  • 1 tbsp of maple syrup
  • 1 tbsp of coconut aminos
  • sea salt and black pepper to taste
Instructions
  1. Add greens to dish, then cut orange slices.
  2. Thinly slice red onion and add to salad, then sprinkle on some sesame seeds.
  3. Mix up the salad dressing (rice wine vinegar, maple syrup, & coconut aminos) and set aside.
  4. Fry up burgers, season with sea salt and black pepper.
  5. Then, fry up eggs sunny side up and place over burgers.
  6. Add fresh ground black pepper to eggs if desired.
  7. Drizzle salad dressing over salad, sprinkle salad with sesame seeds and serve.
Nutrition Information
Serving size: 2

My Experiences with Psychotherapy for Pain Relief

I started going to psychotherapy sessions at the recommendation of my physical therapists. At physical therapy, they guided me through some visualizations and breath work exercises, which can be helpful for those with an over active nervous system. These type of exercises are continued at my psychotherapy sessions, where I also get traditional counseling that addresses many of my fears and anger issues regarding my nerve pain. It’s been studied that individuals with chronic pain are likely to experience symptoms of depression as well (1).

Tension and stress that are held in the body can easily manifest as painful symptoms. One way of relieving that stress, without creating more, is to have a safe environment where you can vocalize your worries. I procrastinated paying for therapy for the longest time, and choose it work out my problems with my friends and family. Not only was this a drain on my relationships, but it can also caused additional stress when my friends and family were unable to handle or understand what I was going through. I eventually went to Dina Bernat-Kunin, LCSW. (Disclaimer: This is not a paid promotion, I’m merely providing one of the many resources I use to improve my health)

In conclusion, I’ve personally benefited from the whole body approach. You all know how important nutrition is to my healing process, but it is only one part of the puzzle. Having chronic pain definitely requires mental fortitude, which is why getting a professional to help you be stronger mentally can be just as helpful for your recovery as getting a physical therapist to help with your physical strength.

1. Ohayon MM, Shatzberg AF. Using chronic pain to predict depressive morbidity in the general population. Arch Gen Psychiatry. 2003;60:39–47. [PubMed]

Easy Asian Cucumber Salad


I’ve done diets with and without vinegar. Since it is a processed product from a bottle I encourage you to do your own research and decide if you want to keep it in your diet. I found this awesome article by Paleo Magazine, Is Vinegar Paleo? It’s got some great links and quotes from our favorite paleo authorities on the topic.

I normally use apple cider vinegar, since I consider it a traditional raw and fermented food with the mother (culture) still in the bottle. However, this recipe just tastes better with rice wine vinegar. Decide for yourself what works best with your body. Lemon or grapefruit juice can be a great substitute if you are looking for an alternative to vinegar in recipes, especially in salad dressings. I often ask restaurants to bring me a side of lemons and some olive oil for my salads. Citrus juicers are pretty inexpensive if you need to make a lot of juice for a large recipe. You can also keep the juice ready to go in the fridge, to use whenever you need it. If you choose to only use apple cider vinegar consider infusing it with some herbs or spices, so you can have different flavors.

This salad is the only one I know that actually tastes just as good, if not better the next day so go ahead and make a ton! You will be surprised how fast it disappears. I went easy on the raw onions, but I love them and normally add more.

Easy Asian Cucumber Salad
 
Prep time
Cook time
Total time
 
Ingredients
  • 2 whole cucumbers thinly sliced
  • ½ red onion thinly sliced
  • ⅓ cup of rice wine vinegar
  • ¼ tsp sea salt
1 tsp of sesame seeds
Instructions
  1. Thinly slice cucumbers and red onion, use a mandoline if available.
  2. Toss with rice wine vinegar.
  3. Then sprinkle with sea salt and sesame seeds.
Nutrition Information
Serving size: 2

This post is featured on Urban Naturale’s Blog Hop.