Category Archives: Snacks

Classic Hummus

Garlic-hummus-v02

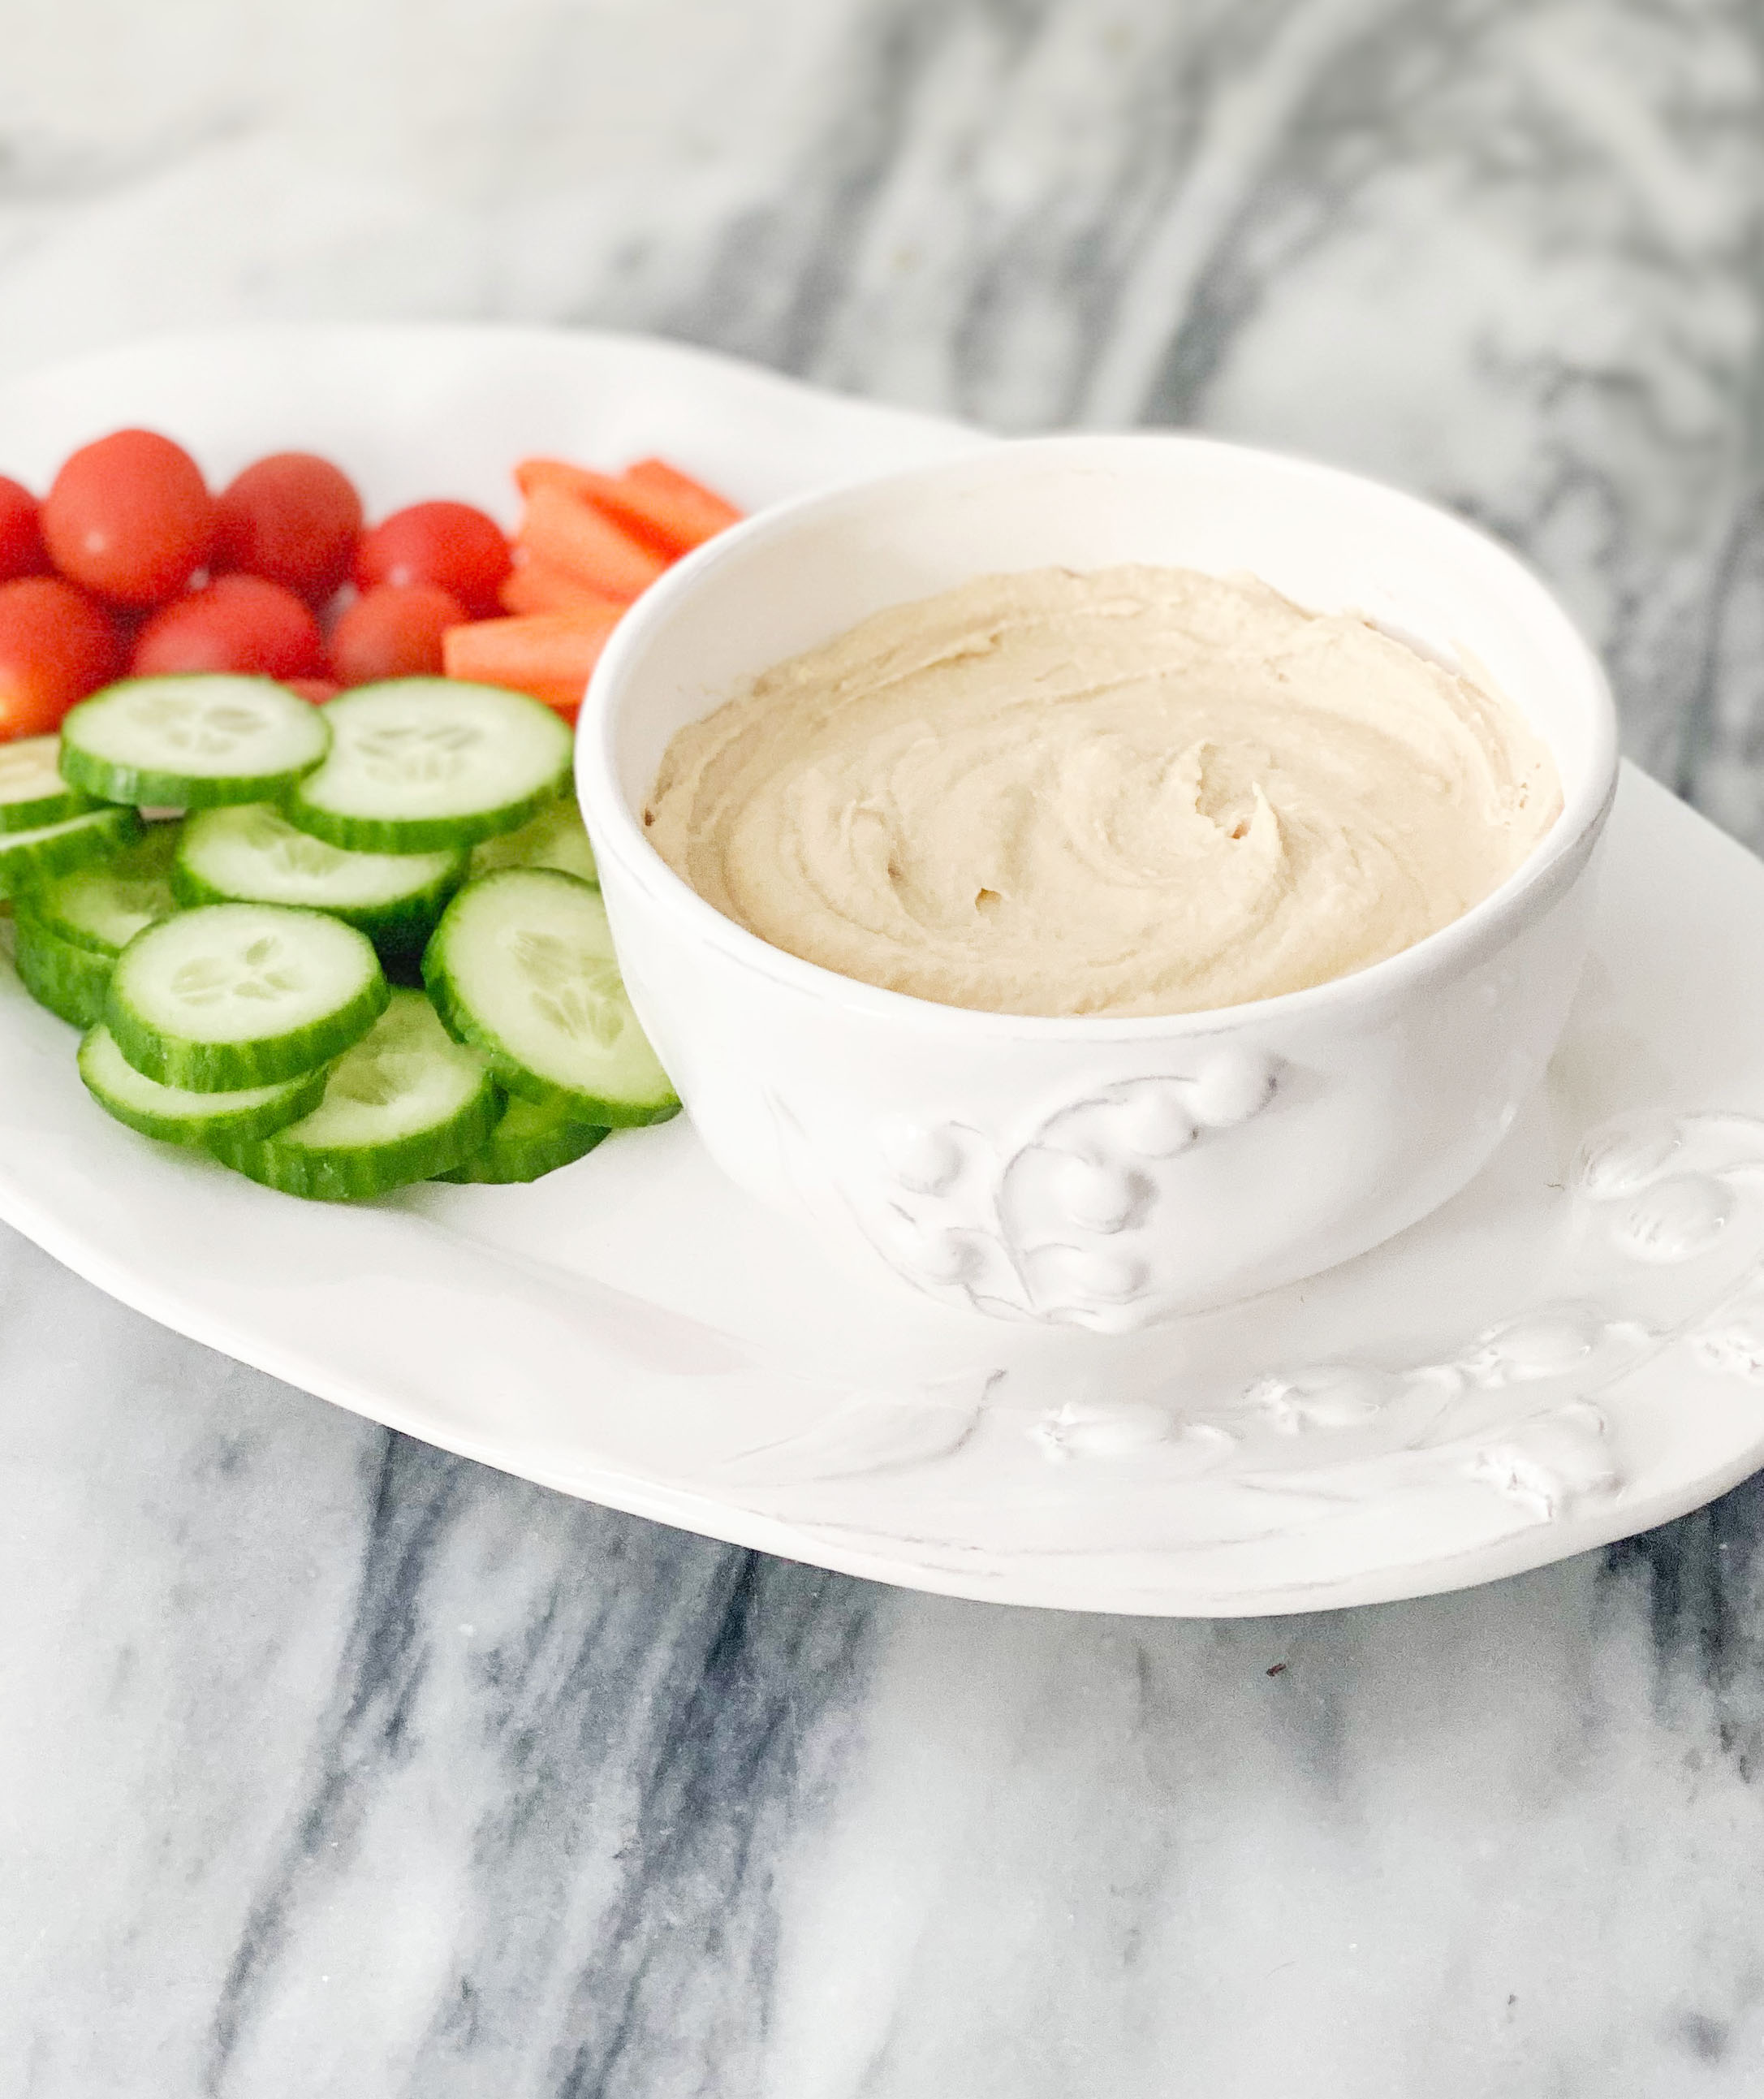
Hummus with vegetables is a healthy and easy snack you can make with canned chickpeas. I boiled my canned chickpeas with a little baking soda, to make it easy to peel the chickpea skins and get extra creamy hummus. America’s Test Kitchen recommends 1.5 tsp of baking soda per can. Although I’ve made hummus before, I was particularly happy with how creamy it turned out this time. So I will be repeating this technique.

This classic recipe would also make a great base if you wanted to add other flavors. Roasted red peppers would be delicious, so would some jalapeno, cilantro, and avocado for a spicy dip. Let me know in the comments your favorite hummus flavors!

Classic Hummus
 
Prep time
Cook time
Total time
 
Author:
Serves: 6
Ingredients
  • 2 cans of chickpeas
  • 3 tsp of baking soda
  • 6 tbsp of ice cold water
  • 5 tbsp fresh lemon juice
  • 3 large cloves of garlic, pressed
  • 1 cup of tahini paste
  • 1 tsp of sea salt
Instructions
  1. Boil chickpea in a pot with baking soda for 3-5 minutes.
  2. Drain and rinse with cold water vigorously to help remove skins.
  3. Peel the rest of the chickpea skins off and add peeled chickpeas to food processor.
  4. Then add water, lemon juice, pressed garlic, tahini paste and sea salt to food processor.
  5. Blend food processor until hummus is smooth.
  6. Serve with chopped vegetables.

Fermented Garlic Dill Pickles

Fermented Pickles  - Healing and Eating

These fermented garlic and dill pickles were surprisingly easy to make, and are full of vitamins, enzymes, and rich probiotic cultures. I love pickles, so this post is kind of a big deal for me. They are one of my favorite sugar free snack options. Plus, the sour flavor helps me control sugar cravings.

However, fermenting food kind of freaks me out, even though I have done it before. I mean you are basically letting food spoil in a way that’s healthy and grows beneficial bacteria. Although I eat a lot of fermented food, it’s usually bought already made from the grocery store, which can get pricey. So, I used the Perfect Pickler Kit, to help me out, which comes with very clear and detailed directions. This kit also comes with a lid and air-lock which attaches to your one quart wide mouth mason jar. Since microbes require an airless environment, the air-lock allows gasses to escape and seals out airborne microbes. It also seals in the odors for a delicious tasting pickle.

Here is what it looks like with my dill pickles:

perfect-pickler

Helpful Tip: Keep in mind these are not shelf stable pickles and will need to be stored in the refrigerator. They remain fresh for months. If cucumbers soften, they can be turned into relish.

Fermented Garlic Dill Pickles
 
Prep time
Cook time
Total time
 
Author:
Serves: 1 quart
Ingredients
  • 3-4 pickling cucumber chopped
  • 3 cloves of garlic
  • 1 tsp pickling spices (penzys)
  • 2 tbsp of fresh dill or 4-5 sprigs
  • 1 tbsp sea salt
  • 2 cups of water
  • Perfect Pickler Kit
  • wide mouth mason jar (1 quart)
Instructions
  1. Wash perfect pickler components in warm soapy water.
  2. Chop pickling cucumbers into thick slices and add to mason jar.
  3. Then add garlic, pickling spices, and fresh dill.
  4. Using filtered water, create salt water brine and fill to 2 inches from top.
  5. Then add overflow cup from kit on top of pickles.
  6. Then add mason jar lid and attach air lock to lid.
  7. Let it sit for 4 days at room temperature, best results work at 70 F (21C).
  8. After 4 days, taste test to see if right taste and firmness.
  9. If tastes good, store in the refrigerator. If it needs more time, let it stay at room temperature longer.

Disclaimer: Perfect Pickler has not paid me for this review, or sent this product to review. This is my honest opinion and this product was given as a gift from my amazing mom. (See Mom I’m using it!)

Save

Save

Save

Save

Save

Save

Save

Save

Save

Save

Save

Save

Save

Oatmeal Raisin Granola

Oatmeal Raisin Granola - Heaing and Eating

This oatmeal raisin granola is gluten and dairy free, and tastes just like an oatmeal raisin cookie. This was my first attempt at granola and I’m very happy with the results, and how easy it was to make a large amount. This recipe is a very budget friendly and convenient alternative to breakfast bars and gourmet granola, and is great for meal planning since it makes a ton of granola! Seriously, you will have enough for the week as well as some to give away to family and friends. Even though I did use natural sweeteners, granola is still high in sugar and should be consumed in moderation or even as dessert. I think it would taste just as delicious over some vanilla ice cream as it would over yogurt.

Oatmeal Raisin Granola
 
Prep time
Cook time
Total time
 
Author:
Serves: 9 cups granola
Ingredients
  • ¾ cup of maple syrup
  • ¼ cup of coconut palm sugar
  • ½ cup of coconut oil
  • 4 tsp vanilla extract
  • ½ tsp sea salt
  • 5 cups of old fashion rolled oats (gluten free)
  • 2 cups of raw sliced almonds
  • 1 cup of thompson seedless raisins
  • 1 cup of golden raisins
Instructions
  1. Preheat oven to 325 degrees fairenheight.
  2. In a mixing bowl add coconut sugar, sea salt, vanilla extract and maple syrup. Mix so there are no clumps of sugar. Then, add in coconut oil.
  3. In another large bowl add rolled oats, then pour wet mixture over oats and stir in so everything is covered.
  4. Line a baking sheet in parchement paper, then pour granola onto cookie sheet and spread it out evenly with a spatula. Pat it down with spatula to pack it in or compress it together.
  5. Then bake for 40 minutes, and then let cool for an hour.
  6. When cool, use a spoon or fingers to help you break up the granola.

Save

Save

Sliced and Salted Avocados

Sliced and Salted Avocados - Healing and Eating

Sliced and salted avocados are one of my favorite sugar free snacks. You don’t have to cook this, so it’s as fast as fast food can get. Plus, you only need two ingredients – ripe avocados and sea salt. This snack works for practically any diet whether it’s AIP, vegan, paleo, gluten free, dairy free, and even sugar free. When I’m starving and wandering around my kitchen looking for snacks that aren’t there, this is usually my favorite option.

Sliced and Salted Avocados
 
Prep time
Total time
 
Author:
Serves: 1
Ingredients
  • 1 avocado
  • ¼ tsp sea salt (or to taste)
Instructions
  1. Slice avocado in half.
  2. Remove the pit.
  3. Then slice across avocado for easier scooping.
  4. Sprinkle halves with sea salt and enjoy.

Pickled Carrots and Jalapeños

Quick Pickled Carrots and Jalapeños

Instead of chips and dip, quick pickled carrots and jalapeños are an easy snack food to make for Cinco de Mayo, that’s paleo friendly. You can make it ahead of time in bulk, so you can enjoy your party, instead of slaving away in the kitchen. This recipe is pretty spicy, even though I only used one jalapeño, so if spicy food isn’t for you, you might to seriously reduce the amount of chopped jalapeños. The carrots are the best part anyway. I love pickled carrots!

Pickled Carrots and Jalapeños
 
Prep time
Cook time
Total time
 
Author:
Serves: 16 oz
Ingredients
  • 1 cup of water
  • 2 cups of white vinegar
  • ½ cup of honey
  • ½ tsp sea salt
  • 3 grinds of fresh ground black pepper
  • 1 bay leaf
  • ½ tsp ground cumin
  • 1½ cups of chopped carrots
  • 1 cup of chopped red onions
  • 1 sliced jalapeño
Instructions
  1. Peel and chop carrots on a bias.
  2. Chop red onions and slice Jalapeño.
  3. Add chopped veggies to a saucepan with water, vinegar, honey, sea salt, black pepper, a bay leaf, and ground cumin.
  4. Bring everything to a boil, and let boil for 5 -10 minutes. 5 minutes for firmer vegetables.
  5. Then transfer to jars and fill with remaining brine.
  6. Refridgerate for at least 24 hours. Then enjoy.

Baked Pepperoni Chips

baked-pepperoni-chips

Merry Christmas! These baked pepperoni chips were a hit at Christmas Eve. Plus, they are really easy to make. These chips make a fun snack food for those avoiding carbs, grains, and gluten. But they are pretty salty and spicy on their own, so be sure to serve it with some festive drinks, and don’t add any additional seasoning! Trust me, they don’t need it.

I hope everyone had a yummy holiday! I know I sure did.

Baked Pepperoni Chips
 
Author: Lauren Bolanos
Prep time: 2 minutes
Cook time: 8 minutes
Total time: 10 minutes
Serves: 4-6
Ingredients
  • 1 lb sliced pepperoni
Instructions
  1. Line cookie sheet with foil.
  2. Place sliced pepperoni on cookie sheet and bake for 8 minutes at 350 degrees.
  3. Let pepperoni drain on a paper towel, and the oil dry out a bit before serving.